Link to support: https://www.learndash.com/support/docs/add-ons/woocommerce/
Create a Product & Assign Your Course
Now let’s create a product in WooCommerce.
- Navigate to PRODUCTS > ADD NEW
- Fill in the appropriate information for your product (see WooCommerce’s guide on adding products)
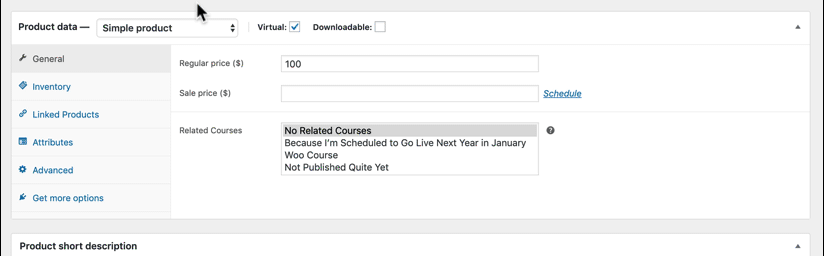
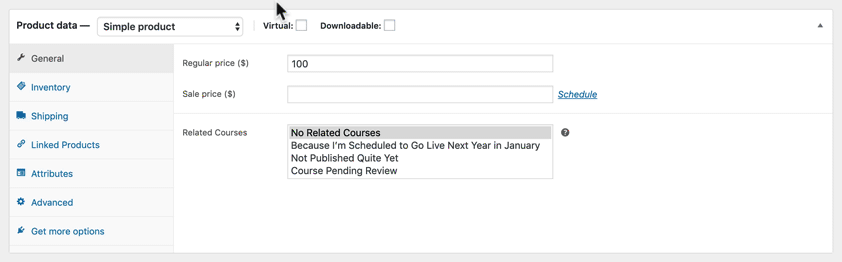
- Scroll down to the Product data section
- Next to the Simple Product dropdown menu, check the box for Virtual
- Open the Simple Product dropdown menu and choose Course
- Next to Related Courses, click on the course you’d like to associate with this product
- Be sure to publish or update your product when you’re finished
BUNDLE COURSES
You can bundle multiple courses and sell them with a single WooCommerce product. Hold down the SHIFT key when selecting courses from the list.
Set Up Your Course
After your product is set up in WooCommerce, you’ll need to make a few adjustments to your LearnDash course.
- Navigate to LEARNDASH LMS > COURSES
- Click on the course that corresponds with a WooCommerce product
- Click the Settings tab at the top
- Under Course Access Settings, look for Access Mode
- Set this to Closed
- In the Button URL field, enter the URL to your WooCommerce product page

Now when people visit your course page, the “Take this Course” button will send them to the corresponding WooCommerce product page, where they can add the product to their cart & complete the checkout process.
TIP
Want to speed up the checkout process? You can add the product to a user’s cart AND redirect them to the cart page all in one step. In the Button URL field, enter your cart URL (typically /cart/), followed by ?add-to-cart=123, where 123 is the WooCommerce product ID. The entire URL will look like this:
https://yoursite.com/cart/?add-to-cart=123
Additional Tips
While not required, there are a few additional things you might want to consider with your setup.
Add a Purchase Note
WooCommerce has a built-in field called “Purchase Note.” This note is shown to the customer in a few places, after a successful purchase:
- On the purchase confirmation page
- In the customer’s receipt email
Consider using this field to provide instructions or next steps for taking your course, along with a link to the course page.
- Navigate to PRODUCTS
- Click on the product you’d like to add a purchase note for
- Scroll down to the Product data section
- Click on the Advanced tab
- Enter your instructions and/or a link to your course
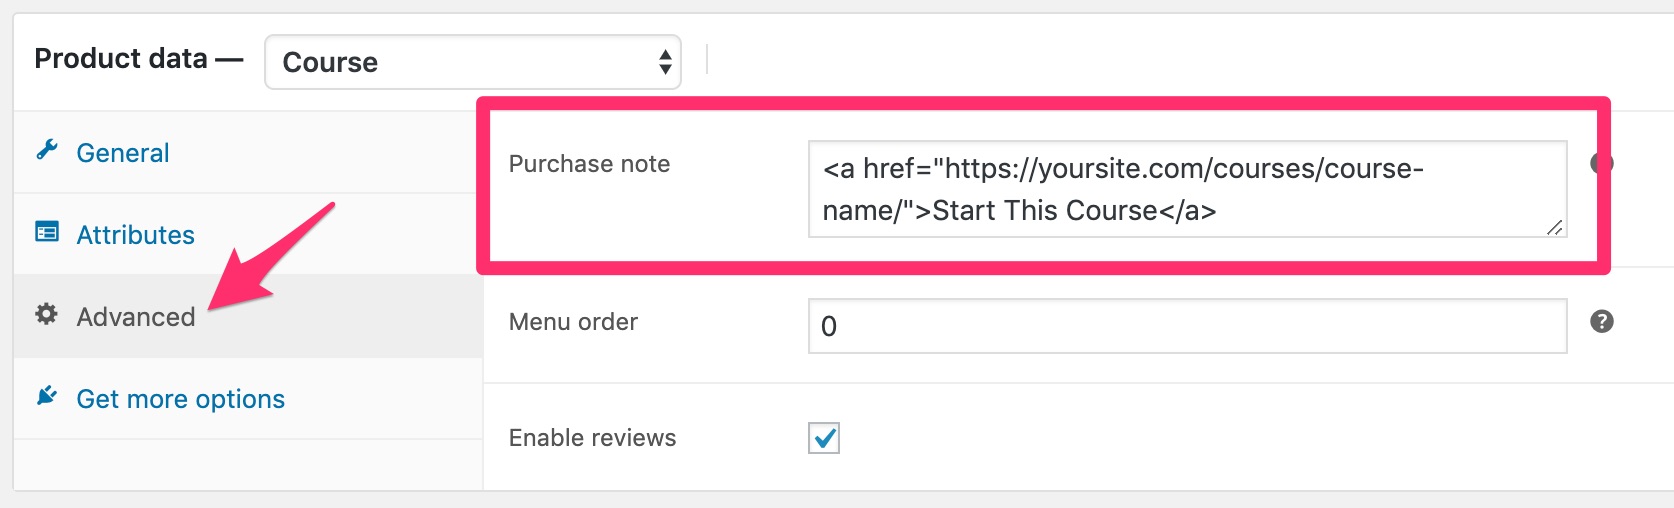
This field accepts HTML. Here’s an example to create a link to your course. Replace the URL with the URL to your specific course.
href="https://yoursite.com/courses/course-name/">Start This Course Use Different Product Types
Did you know you can leverage any WooCommerce product type while keeping the course association?
Learn more about different product types and why you might want to use them.
- On your WooCommerce product, scroll down to the Product data section
- Select the Course product type & choose your Related Course (as outlined above)
- Now you can switch your product type, and WooCommerce will remember your course selection in the background